Fixing ball marks is part of golf etiquette. As stated on the usga website "Players should carefully repair any divot holes made by
them and any damage to the putting green made by the impact of a ball (whether
or not made by the player himself). On completion of the hole by all players in
the group, damage to the putting green caused by golf shoes should be repaired." (http://www.usga.org/etiquette/tips/golf-etiquette-101/)
There are multiple methods and tool that can be used to fix a ball mark, but some can actually cause damage to the green and slow the recovery of the ball mark In the videos below Dave Davies explains how to properly repair a ball mark.
Our Spring Fairway Aerification immediately follows the greens and tee aerification. It usually takes between 5-6 weeks to get everything aerified and top dressed. There are several reasons why this process is important culturally including increased air flow to the roots, compaction relief, and removal of built up organic debris also known as 'thatch'. Because our fairways are predominantly bentgrass which is a high thatch producing grass, we verticut the fairways before the aerifier punched them. Verticutting is a way to thin out the turf as well as remove thatch, using vertical blades that are set the desired depth.
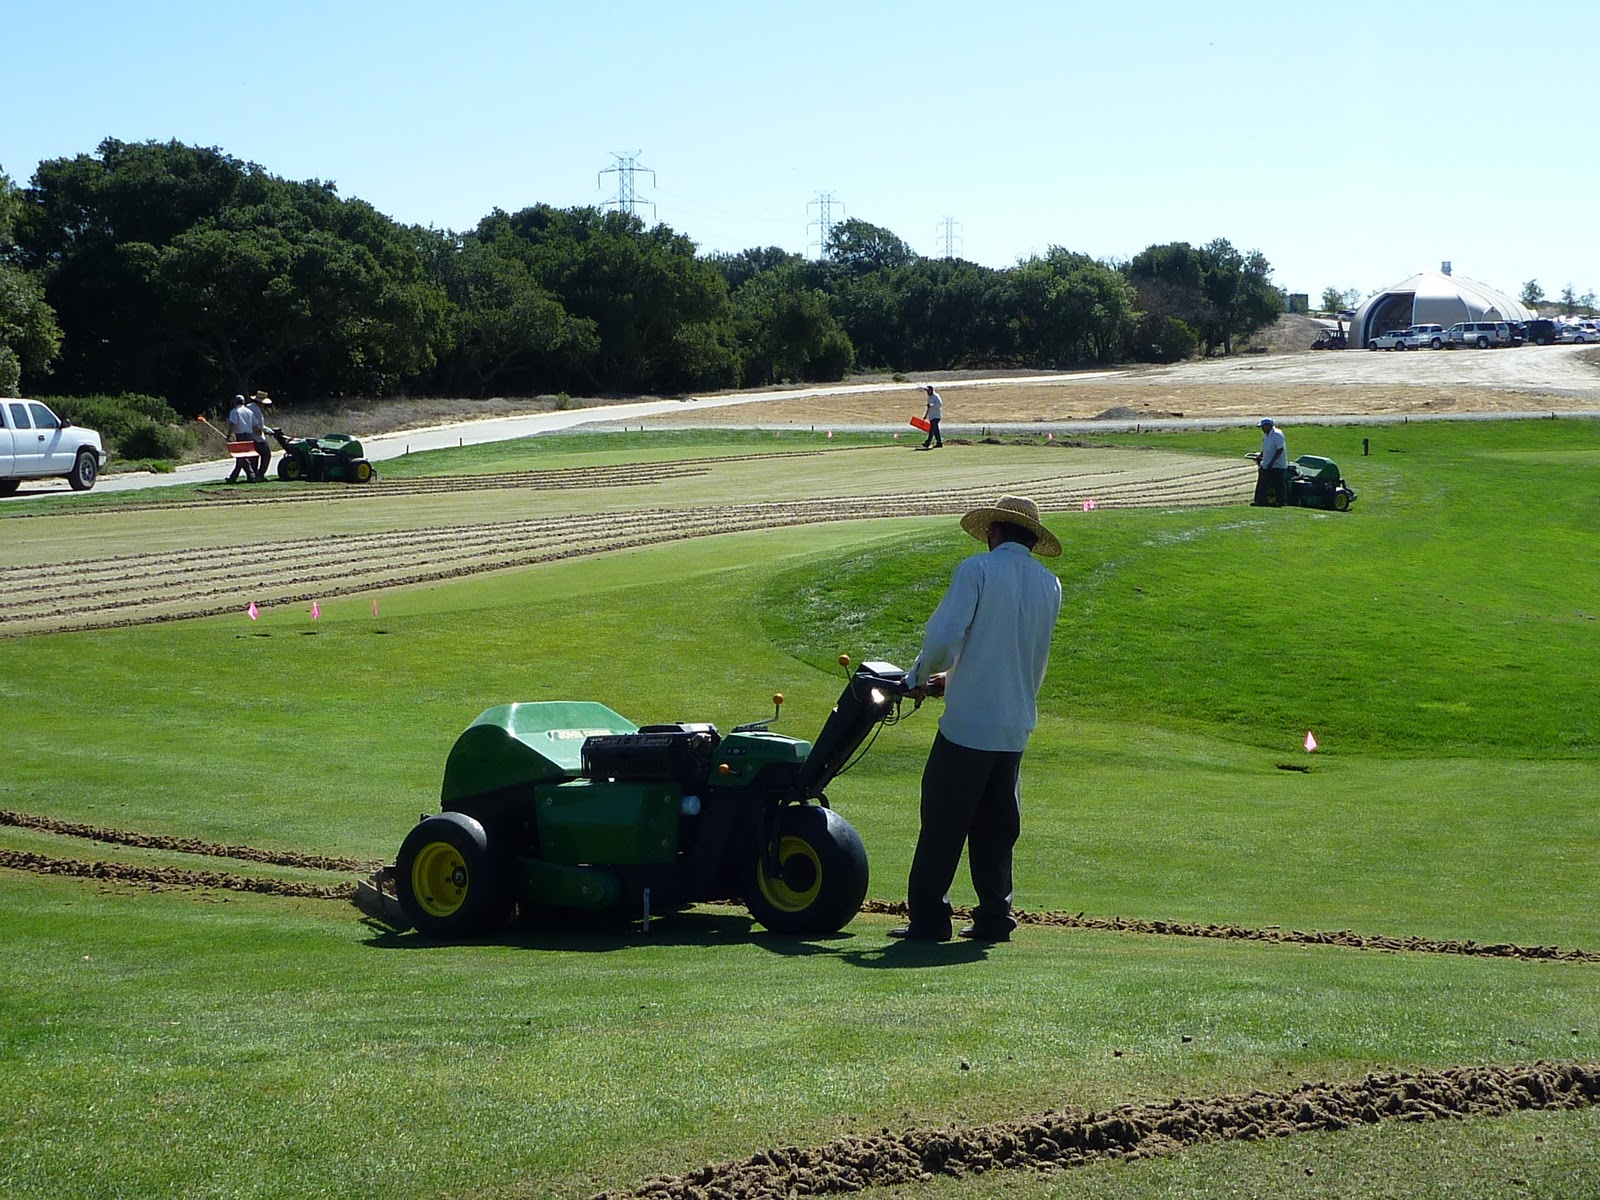
Fairway Aerification includes the following steps ( flag the heads, verticutting the fairway, aerifing, cleaning up the plugs with a sweeper and Pro-Gators, blowing/dragging the fairway, gypsum application, sand topdressing, and the last step is to drag the sand in the open holes.) Most of the process are shown in photo's below.
This is a photo of #10 being Verticut by the Graden. Notice that the rough in the left of this photo is verticut as well, this is one of our high traffic areas.
After the hole has been verticut the aefier then proceeds, this photo shows the operator going in a different direction on a mound in order to get a deeper plug.
After the hole has been aerified it is cleaned. This photo shows the tc-125 sweeper being pulled by a pro-gator. When the sweeper is full it is emptied in the back of a pro-gator, and the plugs are dumped on maintenace paths and/or the village c lot.
While the sweeper is picking up plugs there are a couple people using snow shovels to push cores out of low areas, which are either hand shoveled or picked up later with the sweeper.
Right behind the Sweeper is the blower which also has a drag mat attached, this picks up any smashed cores and debris and moves them to the pile for the sweeper to pick up.
After the gypsum and sand are put down, the fairway is gone over with a drag mat. The objective is to fill the holes and spread the sand out evenly.
This is an example of an area that has been dragged already to one that has not.
Spring Aerification is a chance for use to help relieve the greens from all the stress endured during the fall and winter, which ensures we will have healthy greens going into the summer. Aerification helps remove all the built up organic matter which gives the roots a chance to breath, increasing air movement and infiltration. At TPC Stonebrae our greens aerification process involves a number of steps which are shown in the photos below.
This photo shows first three process of greens aerification at the practice center. First all the head are flagged so they are visable for operaters running the aerifiers. Secondly once the heads are marked the aerifiers proceed to aerate the area. Then after the area has been aerified snow shovels are used to push the plugs into piles off the green, where they can then be picked up using scoop shovels and a John Deere Pro Gator.
After the plugs have been cleaned the green is brushed with a greens groomer. This process helps to clean the surface and stands up the leaf blades, so sand will easily fill the holes.
After being brushed the remaning debris are blow off the greens surface using a buffalo blower.
Since we removed a lot of surface area of the green, they are then handwatered to prevent any stress which could slow the recovery process.
Now the greens are ready for sand. This photo shows both the topdresser and the method used to fill the holes. Once the sand is on the green, blowers are then used to moved the sand across the green, while filling the holes in the process. It's a fast and effecient process.
This is a photo of the green after the holes are filled with sand.
After the holes are filled the greens are then double rolled to help smooth the surface.
Then the greens are ready for the ammendments. The Following ammendments were applied using push spreaders( Triple Seven Fertilizer, Grow Power Mg, and Cal-CM-Plus).
The ammendments are then watered in, which helps break them down so they are readily available to the plant.
This will be our fourth and final week of having the goats graze. They will be starting in between the 1st and 2nd fairways on #12, TTuesday. From there they will work right of the cart path by 12 tee, and move down the right side of #6 fairway. By Sunday the goats will be staged at the lots left of #5 for pick up.
Below are photos of last weeks progress.
In front of #8 Silver/Orange Tee before Grazing.
In front of #8 Silver/Orange Tee after grazing.
Hillside left of the pratice center before grazing
This past week the goats have grazed several areas. Including left of the second landing on #18, right of the cart path on #10, all the way behind #9 Green, and #8 tee. This week they will be starting out between #8 and #9. They will then be moved to graze the slope left of the practice center by the main road, down to the home lots, and by Sunday they should be by the ponds in between the tee's and fairway on #6.
Below are photos of last weeks progress.
Behind 18 green before grazing.
Behind 18 green after grazing.
Left of 18 green before grazing.
View of the left side of 18 green after grazing.
This is the left side of the second landing of #18 before grazing.
This is the left side of the second landing of #18 after grazing.
This is a view of the area right of the cart path of #10 before grazing.
This is a view of the area right of the cart path of #10 after grazing.
This is a view of the goats working #18 from #10 black tee.
We are going on our second week of the grazing project. So far the goats have been going faster than we first anticipated, so we are going to be adding a few more areas to be grazed. This week we will be working in between the cart path on #10 and #7 all the way up to the walk bridge. From there we will move to the left side of #18 and work our way back behind #9 green to #8 tee.
Below I have photos showing the progress of the goats and there grazing.
This is the first area that the goats grazed.
This is what it looked like the next day.
This photo shows the difference between a grazed (left side) and non grazed plot (right side).
Left of 12 before it was grazed.
Left of 12 after grazed.
Left of 12 before it was grazed
Left of 12 after it was grazed
This is behind 10 before it was grazed.
This is behind #10 after if was grazed
This is were the goats are currently grazing. In this photo you can see the shepard has fenced off a stream that we are protecting. This keeps the goats from grazing it.
We have a temporary addition to the Agronomy team, over the course of the next 30 days we will have goats on site. There is a total of 400 goats that will be maintaining 30 acres of over growth in the native areas around the course, eating most of the thistle and harding grass down to 2-4". Mostly in the areas between holes, such as between 8 and 9, 6 and 8, as well as between 11 and 12 where they will be starting .
This process of natural grazing has several benefits as it requires very minimal input.
Have you ever wondered what 400 goats looks like?
Wonder no more.
The video below shows the goats being moved from the lots left of # 6 tee towards #8.
The video below shows the goats being be corralled between 6 and 8.
The video below shows the goats crossing in front of the bridge on #11. This is where they will be starting.
This photo is left of # 11 fairway, in their first pen.
When you are on the course, please don't touch the fence containing the goat as its electric. It serves to contain and protect the goats from any predators.
The Electric fences around the goats are powered by a battery.
This is a view looking down at the goats from #10 tee.