Friday, October 22, 2010

Animal Damage


The location of TPC Stonebrae in the Hayward Hills can best be described as unique, and with that brings its own challenges. One challenge from a maintenance standpoint that we deal with on a regular basis here is animal damage, more so than any other course I have seen. Most of the damage ranges from the high gopher population to wild turkeys running through bunkers, or every once in a while a few deer tracks on a green. On rare occasions we will find damage from wild pigs.The photos below I took this morning on #9 green, it shows damage on the back left part of the green from a wild pig. We do have a specialist that is called whenever there are any pig damage related issues, so we can be proactive and help prevent any future occurrences.

This is a majority of the damage. The area was mended with a divot repair tool to ensure it would not affect playability.


Friday, October 8, 2010

Spring Greens Aerification

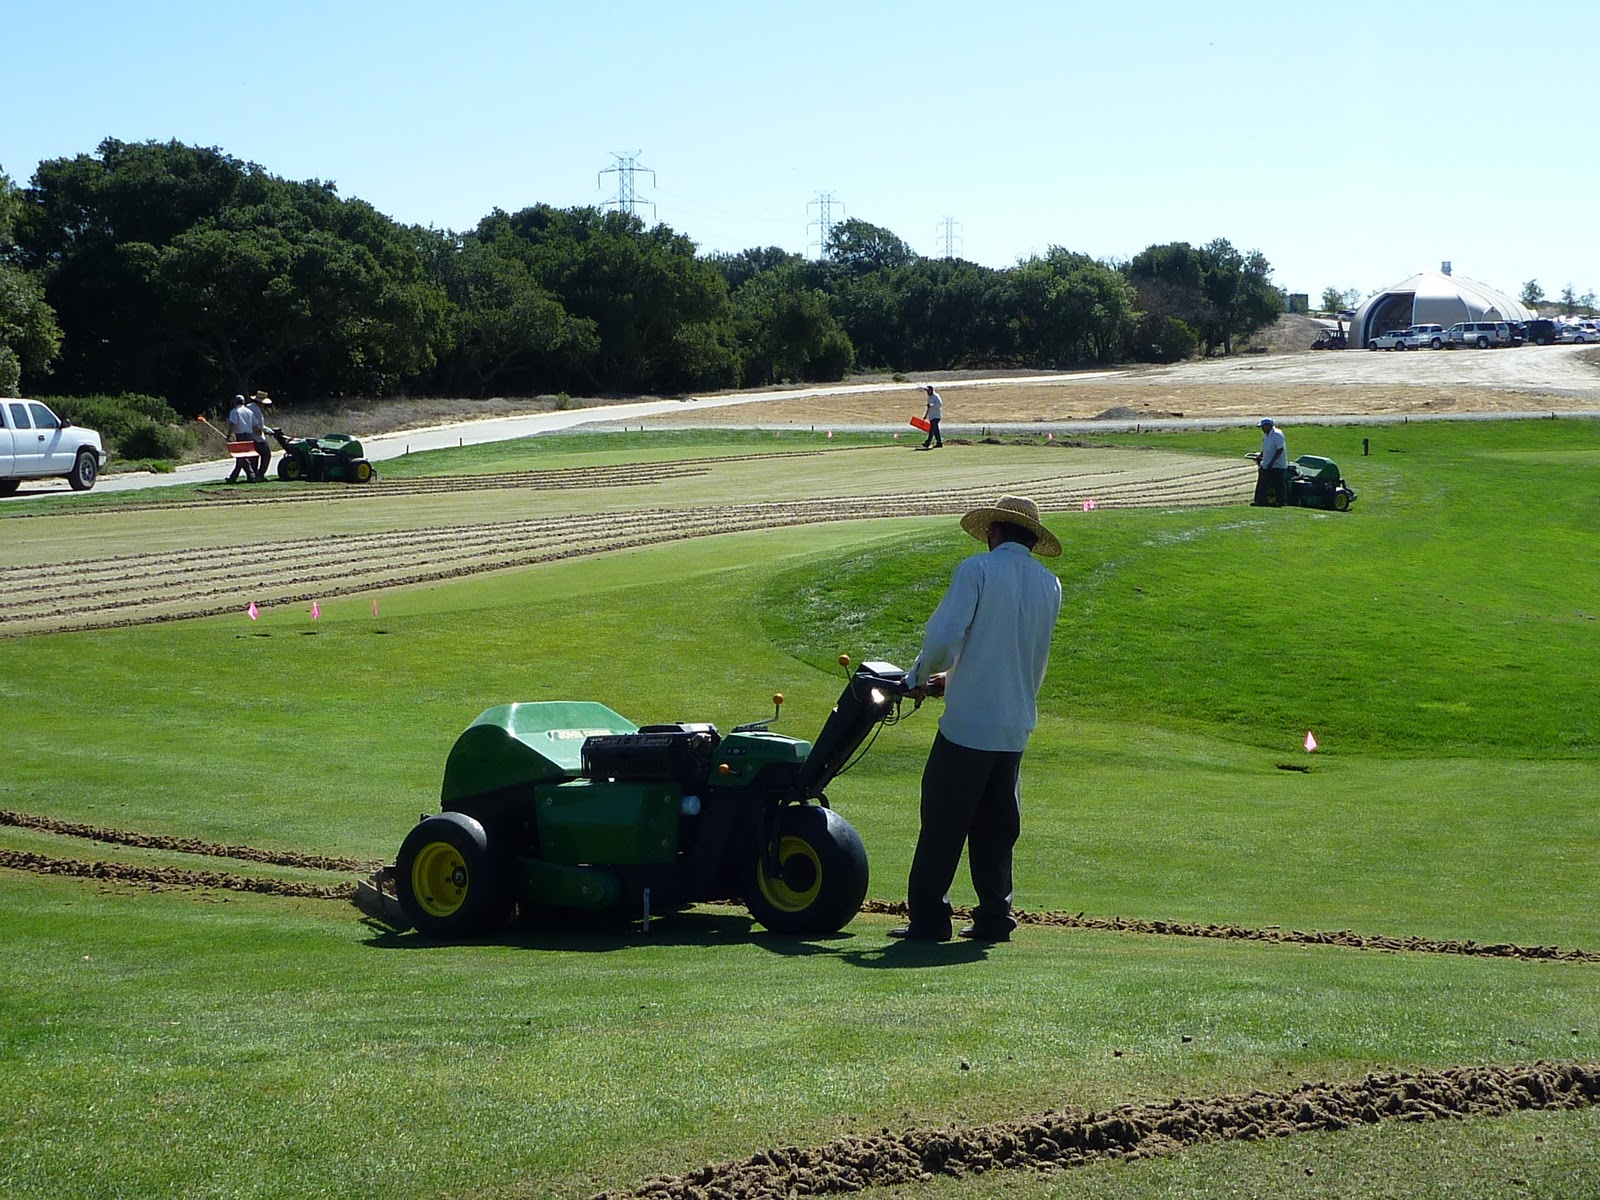
Spring Aerification is a chance for use to help relieve the greens from all the stress endured during the fall and winter, which ensures we will have healthy greens going into the summer. Aerification helps remove all the built up organic matter which gives the  roots a chance to breath, increasing air movement and infiltration.  At TPC Stonebrae our greens aerification process involves a number of steps which are shown in the photos below.


This photo shows first three process of greens aerification at the practice center. First all the head are flagged so they are visable for operaters running the aerifiers. Secondly once the heads are marked the aerifiers proceed to aerate the area. Then after the area has been aerified snow shovels are used to push the plugs into piles off the green, where they can then be picked up using scoop shovels and a John Deere Pro Gator.

After the plugs have been cleaned the green is brushed with a greens groomer. This process helps to clean the surface and stands up the leaf blades, so sand will easily fill the holes.
After being brushed the remaning debris are blow off the greens surface using a buffalo blower.
Since we removed a lot of surface area of the green, they are then handwatered to prevent any stress which could slow the recovery process.
Now the greens are ready for sand. This photo shows both the topdresser and the method used to fill the holes. Once the sand is on the green, blowers are then used to moved the sand across the green, while filling the holes in the process. It's a fast and effecient process.
This is a photo of the green after the  holes are filled with sand.
After the holes are filled the greens are then double rolled to help smooth the surface.

Then the greens are ready for the ammendments. The Following ammendments were applied using push spreaders( Earth works 5-4-5, Potassium Sulfate, and Cal-CM-Plus).

The ammendments are then watered  in, which helps break them down so they are readily available to the plant.

Saturday, September 25, 2010

Bunker Maintenance

In order to retain the integrity and original design of the bunkers at TPC Stonebrae we complete regular bunker maintenance on a biweekly schedule. Regular bunker maintenance includes the following tasks ( edging with a string trimmer, push mowing the interface between the rough and fescue, blowing of debris inside the bunker, and a full rake.)

On a monthly basis in addition to the regular bunker maintenance the fescue slopes are managed using a push mower set at 4".

Also up to three times a year the fescue edges of the bunkers are gone over with a reciprocating trimmer, Which helps to remove the root mass and stop any encroachment that would alter the bunkers shape and design.

Below is a series of pictures going through the complete bunker maintenance step by step.

This is the last fairway bunker on the left of  #17 before maintenance.

This is another picture before maintenace from a different angle.

This is the reciprocating trimmer which is cutting the fescue roots out of the bunker.

After using the reciprocating trimmer the area is gone back over with a flat shovel. This is to  loosen any roots or grass that was trimmed.

This photo is a mass of fescue roots, which is a good example of why this maintenance is a necessity. Because without it the bunker would be overgrown altering the original design.

After the roots have been loosened with a shovel, they are then separated from the sand using a pitchfork for removal. This helps to prevent excessive removal of sand in the process of cleaning up the roots.

This photo demonstrates the mowing of the fescue around the bunker with a rotary mower at 4".

This photo shows the mowing of the rough and fescue interface using a rotary mower.

In this photo a fly mower is being used to maintain the rough along the bunkers leading edge.
After all the mowing is completed the bunker is ready to be edged witha sting trimmer.

After all the mowing and and triming is completed, the debris are then blown out of the bunker.

Now that the bunker is cleaned of debris, sand levels are checked to ensure that there are at least 4" of sand in the flat areas. Any low areas are marked as shown in the photo so sand can be added in the appropriate locations.

After all the maintenance is completed the bunker is then smoothed out and fully raked.

This is an example of the finished product.

Our goal is to leave the bunker looking like no one was in it.


Monday, August 30, 2010

NCGA Area of Emphasis: Irrigation and Water Use Efficiences

At TPC Stonebrae we are constantly striving to provide the best playing conditions possible, which is why proper water management is essential. Constant maintenance and monitoring of the irrigation system is just one of the ways we maximize our water usage. This ranges from trouble shooting heads that are not functioning properly to adjusting run times on heads in wet/dry areas. But in an effort to improve our water management practices on our greens, we have implemented a moisture reading program using a TDR-300 with 3 and 8 inch rods. Readings are recording using 9 different locations per green on monday and friday of every week at a depth of 3 inches and 3 locations per green at a depth of 8 inches. In doing this we can figure out which areas have high or low Volumetric Water Content (VWC). Knowing the VWC of the greens allows us to adjust our water management accordingly to stay within our threshold range and prevent over watering. 

Our goal is to keep our average VWC for each green around 10-13% as we have found this is optimum for playability and health of the greens. Our wilting point is around 6% and our saturation point is anything 20% or higher.


This is a moisture reading I took on #1 green, I felt looked dry which was reaffirmed by this 12% VWC reading.  Although this fits into our acceptable range,  it's a localized dry spot  area recovering from  heat stress. Taking that into account with the high evapotranspiration readings for the week around .20 I decided to hand water it. 
This is a look at the LDS area from #1 green the reading taking above with the 12% VWC.
This is right after I hand watered the area hitting this particular spot two times. 
This is a good example of an area that does not need hand watering which was next to the LDS spot on #1 green.
I took this reading at the same LDS spot on #1 green the following morning,   the spot stayed within our acceptable range showing that it received the proper amount of water. 
LDS area the next morning on #1 green. 
This photo shows the area where I got the 26.2% VWC reading from .