Thursday, May 19, 2011

NCGA Area of Emphasis: Small Scale Course Projects- Drain Repair

Early Spring is a good time to get small projects out of the way, especially before temperatures start rising and shift most of  the focus to water management. One of the small projects I worked on was raising a low drain on #16 Fwy. I took several photos to show the process.


This photo shows the low drain on #16 Fwy. Low drains are problematic for several reasons such as damage to equipment, and it also prevents the turf around the drain from being mowed at the proper height. As you can see in this photo.


Tools for the job, plywood to keep the area around the drain clean, as well as the necessary shovels.

The first step is to remove the sod around the drain. To do this I used a sod shovel.

The pieces are taken out in quarters, and placed turf down in the order of removal. This is done to make the replacement easier.

I used the sod shovel to make sure all the pieces are the same thickness, which helps with leveling around the drain later.

Once the sod is removed the drain can be dug up, and raised/ fixed it necessary. I used two pieces of plywood so I could separate the soil from the pea gravel, I did this because I planned on replacing the soil with sand,

digging up the drain.

After I removed the drain, I placed a towel and shovel over the drain pipe. This ensured no debris would get in the pipe as i cleaned around it.


This is the drain pipe after I cleaned around it.


On this drain we cut a new piece of pipe to level it.

This photo shows Erik cutting the pipe.

Once the pipe is cut to length the drain is re-installed, and then gravel is packed around the pipe.

This shows that the drain is now level.


After I leveled the drain I added sand and packed it. Now it is ready for sod.

After I replaced the sod around the drain, I filled the seams with sand. This keeps them from drying out and also helps with recovery time.

This is what the finished product looks like.


The drain is now level

Monday, February 28, 2011

Tournament Volunteer Experience- Northern Trust Open

Two weeks ago Ryan Borris and I were fortunate enough to have the opportunity to volunteer at the Northern Trust Open, which was hosted at Riviera Country Club in Pacific Palisades. We worked Sunday-Sunday. It was truly a great experience, and I am very grateful to have had the chance to participate. It was an experience that will help us both as we begin preparing for the Fresh Express Classic, which is just around the corner.

I've included some photos from the tournament to show a little bit of what went on in preparation for the Northern Trust Open.


After the welcoming meeting on Sunday we went straight on the course to work. Ryan and I filled fairway divots as we got familiar with the front 9, which is where we worked the rest of the week.


Had to a get a photo in front of the sixth hole, which is a Par 3.


Ryan in front of #6 Green


There were two vans that shuttled the volunteers from our accomodations to the golf course, we left at 3:30 a.m. in the morning for the early shift which lasted until approximately 7:30 a.m.  and returned at 1:30 p.m. for the afternoon shift which generally ended about 5:30-7 depending on the day and assignment. 


We all got together in a tent outside of the maintenance facility for the morning and afternoon meetings, this is where we got the assignments for our shift. For the event there were a total of 35 regular staff members and 35 volunteers.


The greens were immaculate, which shows how much hard work and time was put into preparing for this event.


I mowed Fairways on the front 9 during the event. This is a photo on number 8 where I am mowing a cross cut with a triplex.


Ryan spent most of the week rolling greens on the front 9, which looked like a lot of work. But the results were great with smooth fast greens.


I took this photo after finishing up on the ninth fairway, I cannot really take a lot of credit for the line here. Everything was dialed in upon our arrival, but I did take pride in doing the jobs I was given to the best of my ability.


Moving boards for the greens mowers in the morning. If we did not mow fairways I helped the greens mowers move boards. Which are used to reduce stress on the turn, and to prevent any marking from the rollers when turning.


Boards on #6 Green


Mowing #6 green


In the afternoons we would cross cut the fairways(3/9), but in the mornings we would sweep the fairways and mow from tee to green. As shown in the photo above and this was done with 8 triplex's on each respective 9.


I was intrigued by the divots on the 6th green, which is a result of people chipping over the bunker in the middle of the green.

Wednesday, February 23, 2011

Green Surround Over-seeding

One of our most recent projects has been to focus on some of our more problematic green surrounds. There are a few surrounds that we have had issues with some thinning of turf, which is becoming an issue with playability around the greens. Healthy thick grass is what we strive for around the greens, which is optimum for playability. Our strategy to solve this problem is to over-seed the surrounds that have a lot of thinning turf, which is a result of a number of factors. Most of the thinning is a result of animal damage, high traffic, irrigation inefficiencies, and environmental factors such as shade, and lack of air circulation. Along with over-seeding these area's, we are also implementing several irrigation changes along with some pruning over the next couple weeks.  

Now the over-seeding process itself includes several agronomic practices which help establish the seed, and give it the best possibly growing conditions. Below is a series of photos that cover all the practices involved along with an explanation of there importance.  


This photo was taken on the right side of #4 green. This is by far one of the worst surrounds and is a good example of why we are over-seeding.  There is a big oak tree that is the cause for some of this thinning, but it has also been heavily damaged by gopher activity. In this photo you can see several flags, these are to mark the sprinkler heads and irrigation boxes. This is the first step of the over-seeding process as they ensure easy visibility for operators. 
This photo is just another example of the thinning behind 4 green. 
The second step of the over-seeding process is to mow the surround to a height of 1 inch, this is done for a couple of reasons. First it makes it easier for the seed to make its way to the soil, to help the efficiency of the germination process.  Secondly the mowing of the existing grass stimulates tillering( lateral growth)  of the grass plant, which is results in a much denser stand of turf. 
This photo shows how much debris are left after mowing the surround to inch. 
An up close photo of the difference in height of cut, you can see how there is more surface area for the seed after mowing. 
After the surround has been mowed down to 1 inch, it is then aerified using solid tones with close spacing. This helps to relieve soil compaction and increase air flow within the root zone. Ultimately this results in a healthy grass plant. 
After its aerified we then go over the surround with a verticutting unit which is attached to a John Deere tractor. This helps to remove any dead/built up material from the soil profile, as well as creating grooves to help the seed contact the soil. Which will help with germination and keeping the seed wet until germination. 
Now it time to clean up the mess we just made. This is done with a combination of leaf rakes, back pack blower, and a buffalo blower. Most of the debris are placed in to piles which are then loaded into a pro-gator, anything left over is cleaned up with the buffalo blower.  
All the material closer to the green are pushed out about 6 feet from the green,  which gives the buffalo blower room to operate. It also reduces traffic close to the green complex. 

This is a close up to show an area after it has been aerified and verticut. 

This is what it looks like after it has been seeded, which is then followed by a starter fertilizer and watered in.  The final process is top-dress the surround which helps with water retention, a key component for germination. 


Monday, February 7, 2011

NCGA Area of Emphasis- Course Projects: Fescue Slope Renovation

One of the bigger projects that we are working on right now is the renovation of the fescue slopes around bunkers. The goal is to replace the fescue around bunker slopes in key areas as needed. The areas that need fescue are predominately south facing slopes, where the fescue seems to struggle. But there are also some that have excessive animal damage. 

 Now this is a fairly involved process, which is why we are targeting the worst bunkers. The objective of this renovation is to restore the bunkers back to the original design, and in some cases change the grass type which can handle the environmental conditions better in certain areas. A good example would be the green side bunker on #12, it was originally all fescue. With it being a south facing slope, the stress from being in the direct sunlight was causing the fescue to struggle. So we took sod from out of the nursery fairway/tee blend, and used it in place of the fescue. The blend consists of ( 30% Creeping Red Fescue, 25% Chewings Fescue, 20% Kentucky Bluegrass, 15% Colonial bentgrass, and 10% Perennial Ryegrass). I've included photos below to show what we did along with an explanation of each process.  


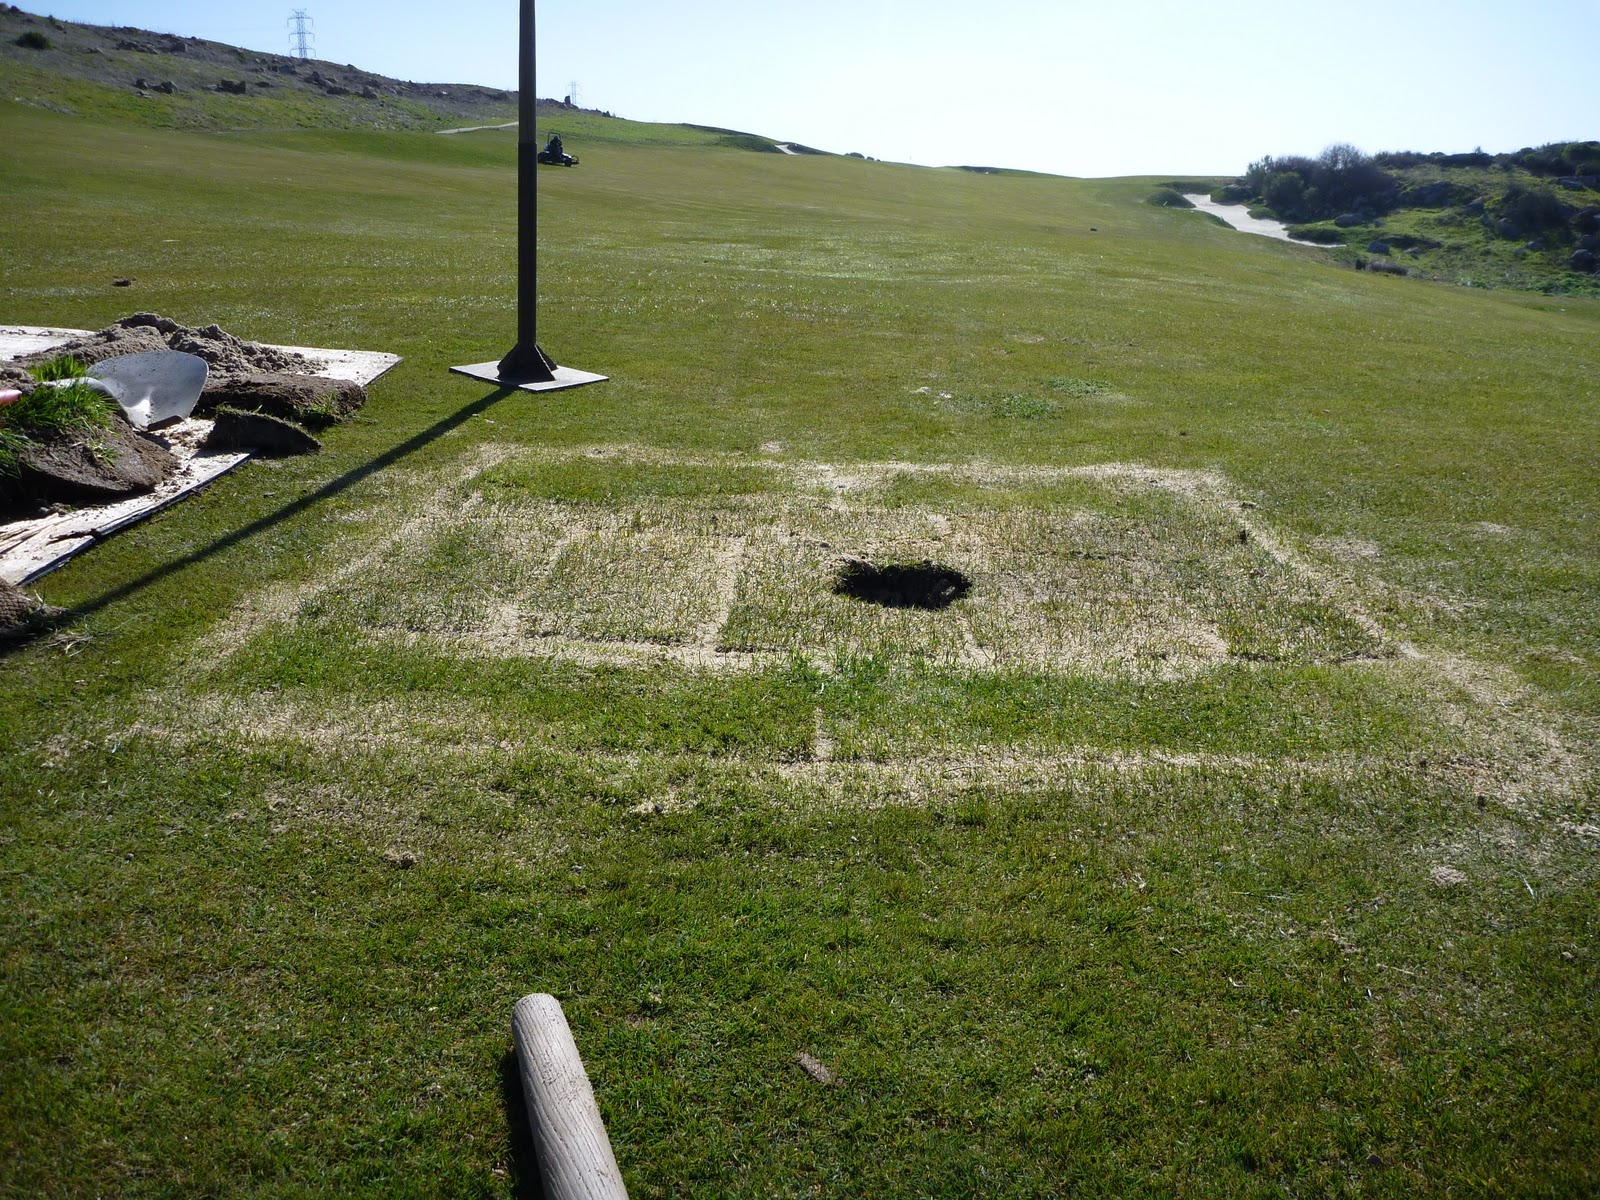
This is the Green side bunker on # 12. As you can see there is a considerable amount of thinning and dead spots, which is why we resodded it. The first process is to prepare the bunker for sod. To make the process go as fast as possible, we use a Jr. Sod cutter in any area possible. First we make a pass around the outline of the area we are going to treat, which in this case is the entire bunker. 

After we have used the sod cutter in the flat areas, we use flat shovels and a reciprocating trimmer to remove the rest of the grass. We then go back with some soil to add to any damaged areas, to smooth out the grade before sodding. That concludes the prep work for the bunker


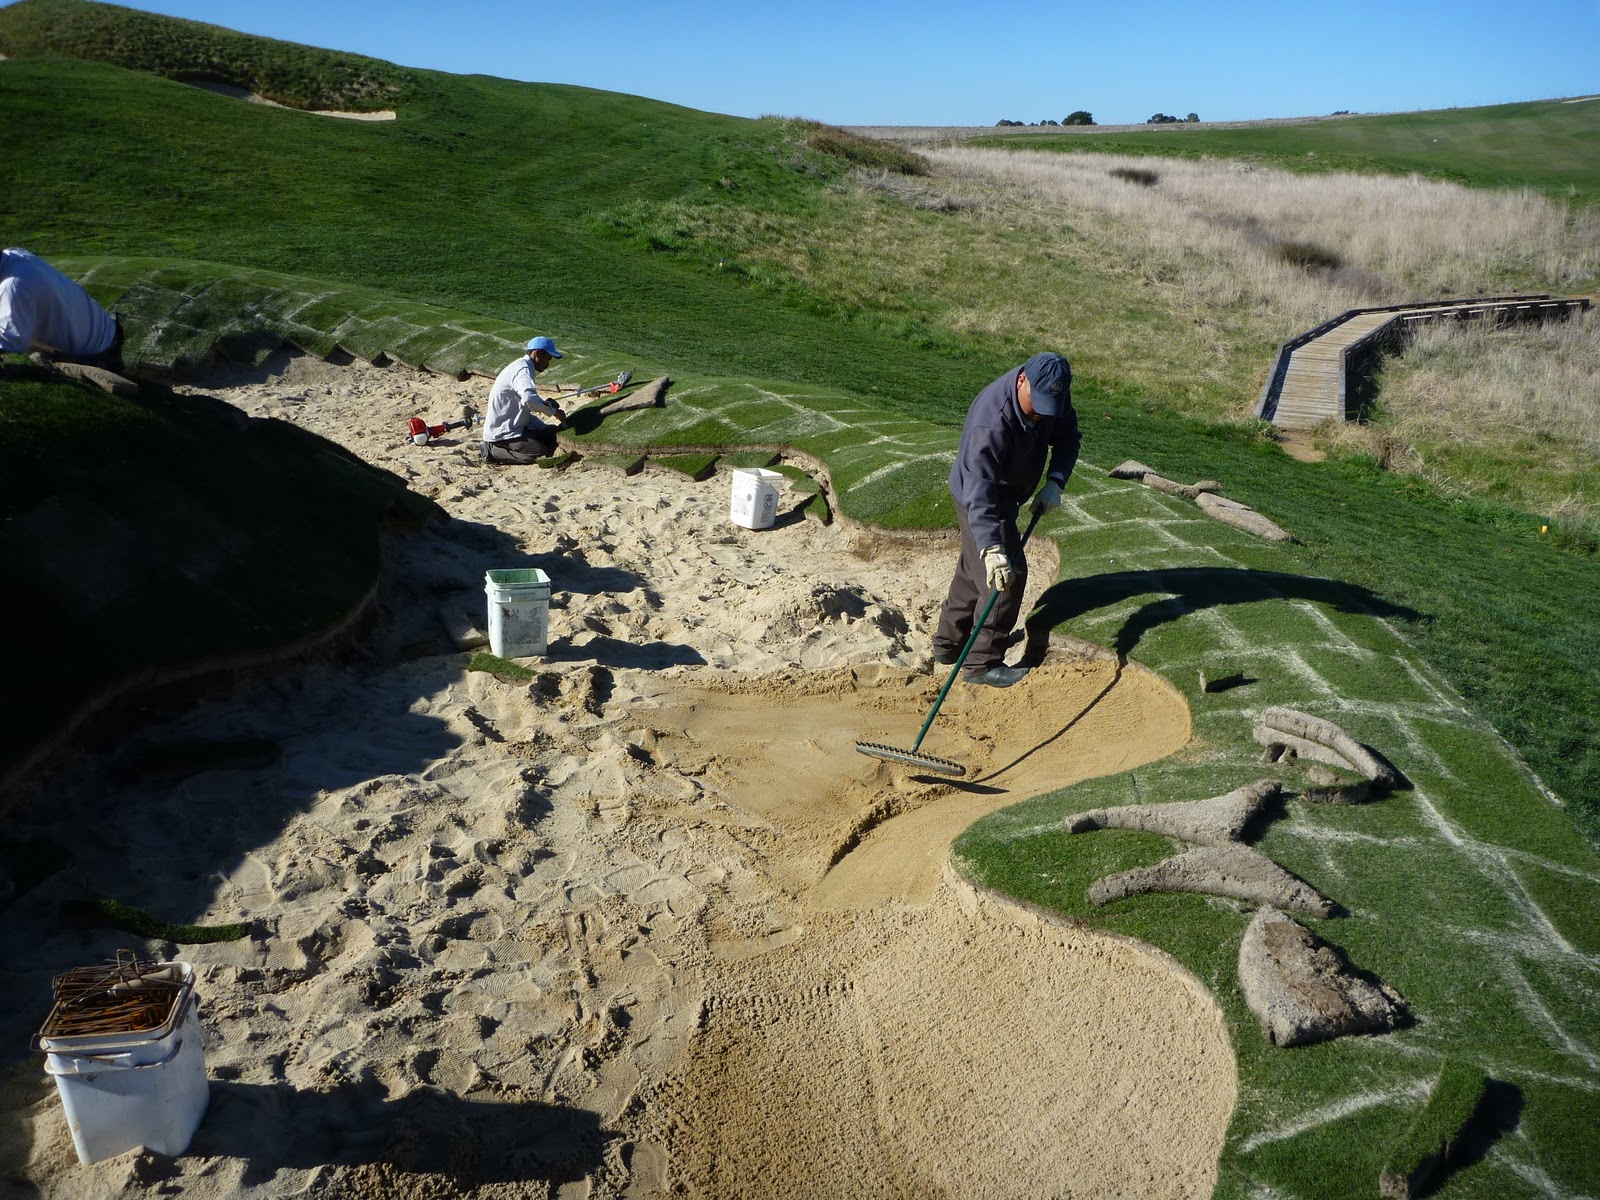
When we start laying the sod down it is important to start from the edge of the bunker and work up the face of the slope. The sod is laid in a staggered pattern so the seams don't line up, staggering the seams helps the turf to get established quicker. Also ensuring the adjacent rows are laid in a tight manner helps minimize air flow in between the rows of the installed turf , preventing the edges from dry out.


This photo shows the sod being laid around the perimeter of the bunkers edge first.

All the sod on steep slopes such as the one in this photo have been stapled down, this ensures it will not shift while we wait to establish the turf.


Pieces are cut in place to fill any gaps that occur during the process.


After all the sod has been laid down and cut, the seams filled with sand to prevent the edges from drying out.
After all the seams have been filled with sand, the final edge is ready to be cut. This is done with a reciprocating trimmer.


This is what the edge looks like after its been cut.

After the edge is cut sand can be pushed back into place.
The bunker is then cleaned of any debris to avoid contaminating the sand, and is full raked.

We also used a starter fertilizer (6-20-20) as well as a granular wetting agent to help the sod establish.


The final step is to hand water in the fertilizer and to keep the sod from drying out.


The bunker is roped off and marked ground under repair.

Saturday, January 15, 2011

Box Brush and Thistle Removal

One of the current projects we have been working on is the removal of thistle and brush from the native areas. The removal of these weeds is important for a number of reasons, playability from landing areas if you miss the fairway, it also helps bring the aesthetics of the golf course back to the original design, and most importantly it stops the obnoxious weeds from taking over the native areas which border the course.

The process for removing the weeds is pretty simple. Some of them can be pulled by hand because of how soft the ground is currently, but others are removed using a shovel or a pick axe. After removed they are then loaded into the back of a pro-gator and brought back to maintenance facility, where the debris are put into a pile.


Days where we have frost allow us to work projects such as the Native Weed Removal.


This is a photo shows of the guys cleaning the area around the courtesy path between 12 green and 13 tee.

This is the area around the courtesy path before we started. 
This is what it looked like after we finished the removal process.


This photo shows our newest addition to the agronomy team, Ryan Borris, using a pick axe to remove box brush.


This is a view from the Pro tee on #13 after we got done.
This photo shows how many oak tree suckers and box brush there was in front of  #13 tee on the right side.
This is what it looked like after we got it cleaned up.